
This document covers the basics of blog posts for the BEA.gov website.
Important
- Editing a published blog? Switch into Draft mode before you start!
- Copy/Paste directly from MS Word only into Rich Text format to avoid problems.
- Include images, lists, and tables after the first paragraph to be safe.
- Recycle images already in the library, save time and space.
Essential
- Item 1
- Item 2
- Item 3
- Item 4
Title
- The title will be the source of the auto-generated URL. Drupal will do some minor editing to create a valid URL, typically the removal of special characters and conversion of spaces to dashes.
- The title should always be written in Title Case.
- The title field is flat text so HTML is NOT accepted in this field. There are absolutely no formatting capabilities.
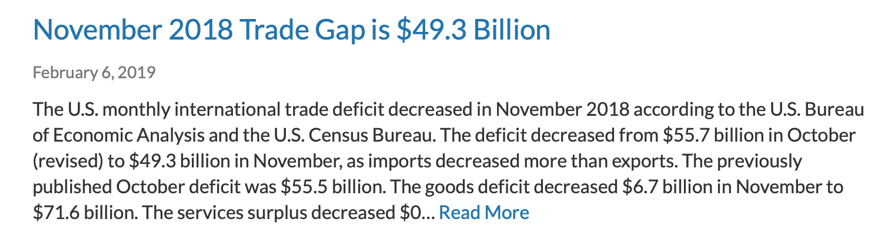
Teaser That First Paragraph
Blog content is shared throughout bea.gov and a single post can take several different forms. One of those forms is a Teaser. What it says is up to you.
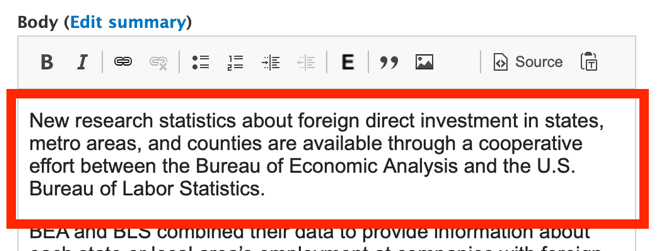
Either method you choose, the first paragraph for all blog posts should always be written in a manner that, if taken out of context, can stand on its own.
Manually
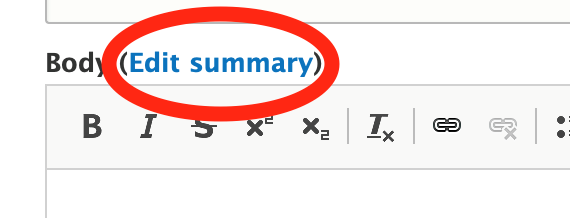
You can provide an explicit summary to be displayed instead of automatically trimmed text. This is flat text so there will be no formatting capabilities but it will say exactly what you want it to.
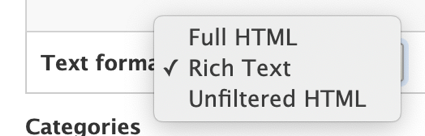
Text Format
There is a drop-down option after the Body field called Text Format. Each has limits but using Rich Text whenever possible will give you the most formatting without getting into coding and odd content behavior.
Some editing options…
- Compose in Word and copy/paste into the WYSIWYG. Be sure the text format is "Rich Text." This will allow basic formatting and links to pass through while keeping all the problematic MS Word styles at bay. Once pasted, you can switch over to "Full HTML" if needed.
- Use the WYSIWYG provided on the web page. It should be capable of handling most editing needs.
- Use Dreamweaver and copy/paste out the source code directly. The Web Team can help show you the ropes if you prefer this method.
Images
.PNG |
.JPG |
.GIF |
| Charts/Graphs/Maps | Charts/Graphs/Maps | |
| Photos | Photos | |
| Transparency | Transparency |
Save it for the web…
- Image dimensions (pixels) should have no less than a 1024px width.
- Image size (kilobytes) should be as small as possible.
This will provide the best quality of image and fastest load times as blog pages resize to fit the viewing device. Images can be much larger so optimization will become much more important.
Example: A chart dimension of 1024x512 is 60kb, optimized it is 20kb. That is roughly a 65% size reduction without a reduction in dimension or image quality. It may not seem like much but as the number of images increase in our library, every little bit adds up substantially.
Photoshop's 'Save for Web' export dialogue (ctrl + alt + shift + s) is a handy tool to see results on-the-fly as you make optimization decisions. The web team can assist if needed.
Recycling Images—Media Browser
If you are creating a post about a press release that has already been published, you don't need to upload your own version of the chart. The image is already (or soon will be) available in our Media Library.
Use the Media Browser to locate and choose the existing image. Alas, the tool-bar button does not have an icon and is 'invisible'. It is located behind the indicated spot on the tool-bar:
 Tool-bar for "Full HTML"
 Tool-bar for "Rich Text"
 Recycling images will ensure the proper size, resolution, and quality with the proper caption and alt tags.
Categories
- Please select at least one of our current blog categories. The website DOES functionally use them.
Tags
- Tags: Not required BUT you should always try to have at least one tag but don't go overboard. We do not display them right now, but once we get the usage established, we will – they are for the user after all.
- Categories are broad (Gross Domestic Product) while tags are more specific (Third Estimate)
- This is a little old but lays it out nicely: How To Pick Blog Categories and Tags That Grow Traffic and Rankings – If you want to search on your own, here are good search terms to start with: "best practices tagging content blogs"
Feature this content on Director's Page?
- This functionality is temporarily replaced. By default, the five most recent blog posts will display on the Director's Page.
Save As Wrapping It All Up
Draft
The Draft state prevents content from being viewed by the public. For newly created blogs this is on by default. For blogs that exist, placing the blog back into draft mode creates a 'working' copy without altering the live version.
[IMAGE OF LATEST VERSION TAB]
For either situation, updating the Save As state to Published will make your changes available to the public.
Did you edit an existing blog? Let everyone know what was changed in the "Revision log message" box! That will help roll-back to the correct version if it's needed.
Published
The Published state allows content to be visible to the public. Moving content into this state will make that content live immediately... so be sure that is what you want to do!
Archived
The Archived state will pull the blog completely off the front-facing site (unlike Draft where a copy is left.) Very handy if you accidentally publish content. You can find archived content on the admin menu under Content.
[IMAGE Content]
Needs Review
Currently not used.
Schedule a status change
[IMAGE exposed schedule]
Want your content to go live when no one's around? ...or maybe for it to just go away in three weeks? Schedule a status change! You pick the date and time, what you want it to do, and the system will do as you wish... well, within about ten minutes of your wish.
Choose 'Archive' if you want to pull your content off the public facing site completely. It will remain in the system though.
Blogs
Any notes.
Locating a Blog
- Show where uploaded images can be found.
- Show how to search.
Editing a Blog
Add a Blog
- Show how to add a new blog
Edit a Blog
- Show how to edit a blog.
- Putting into Draft Mode
Delete a Blog
- Show how to delete a blog.
Images
Any notes.
Re-Use an Image
Locate
- Show how to search for image
Insert
- Show how to insert an image.
Add New Image
Screen Grab your own image
Capture
- Setting up image for a good grab using the Snipping Tool
Crop
- Show how to crop images in MS Paint. Reminders on dimensions.
- https://www.wikihow.tech/Crop-an-Image-with-Microsoft-Paint
Resize
- Info on resizing image
- https://www.wikihow.com/Resize-an-Image-in-Microsoft-Paint
Code blocks for copy-and-paste of items like various tables. Etc.
Personal Income
Copy and past this into the SOURCE code after the first paragraph. Be sure that the Text Format is 'Full HTML' or you will lose style modifications.
<div class="table-responsive pull-right col-md-5">
<table class="table">
<thead>
<tr>
<th align="left" class="text-left"> </th>
<th><strong>Dec.</strong></th>
<th><strong>Jan.</strong></th>
<th><strong>Feb.</strong></th>
</tr>
</thead>
<tbody>
<tr>
<td align="left" class="text-left">Personal income</td>
<td align="center" class="text-center">0.0</td>
<td align="center" class="text-center">0.0</td>
<td align="center" class="text-center">0.0</td>
</tr>
<tr>
<td align="left" class="text-left">Current dollars DPI</td>
<td align="center" class="text-center">0.0</td>
<td align="center" class="text-center">0.0</td>
<td align="center" class="text-center">0.0</td>
</tr>
<tr>
<td align="left" class="text-left">Real DPI</td>
<td align="center" class="text-center">0.0</td>
<td align="center" class="text-center">0.0</td>
<td align="center" class="text-center">...</td>
</tr>
<tr>
<td align="left" class="text-left">Real PCE</td>
<td align="center" class="text-center">0.0</td>
<td align="center" class="text-center">0.0</td>
<td align="center" class="text-center">...</td>
</tr>
<tr>
<td align="left" class="text-left">PCE Prices</td>
<td align="center" class="text-center">0.0</td>
<td align="center" class="text-center">0.0</td>
<td align="center" class="text-center">...</td>
</tr>
<tr>
<td align="left" class="text-left">Personal Saving Rate</td>
<td align="center" class="text-center">0.0</td>
<td align="center" class="text-center">0.0</td>
<td align="center" class="text-center">...</td>
</tr>
</tbody>
</table>
</div>